Ultimate Guide To Charging Your 12v Battery
Author: Your RV Good Guide Date Posted: 11 October 2023

As an RV owner, understanding how to properly charge and maintain your 12V deep cycle battery is crucial for an enjoyable motorhome experience. Whether you're heading off on a weekend getaway or weeks away at a time, knowing the essentials of charging your battery will help ensure an uninterrupted power supply and keep your travels stress-free. In this ultimate guide to charging your 12V battery, we share charging methods, essential maintenance tips, and safety must-knows.
Understanding your 12V battery
New to the world of 12V batteries? No worries, let’s start at the beginning …
Battery basics
Before we start charging, it's a good idea to get familiar with the basics of your 12V battery. At its core, a battery is a complex assembly of cells and chemical reactions designed to store and release electrical energy. There are several types of 12V batteries available for RVs, each with distinct characteristics. These include the traditional flooded battery, lithium-ion batteries, AGM (Absorbent Glass Mat), and gel batteries. While all have their unique advantages, they all operate within a specific range of voltage specifications.
Read more about lithium batteries vs. AGM batteries.

Battery terminology
Getting to grips with the terms associated with 12V batteries will help make understanding and managing your battery system easier. Let's break down some of the commonly used terms:
Ampere-hours (Ah): This is a unit of electric charge, representing the amount of energy a battery can store. To calculate this, you multiply the current (amperes) by the discharge time (hours).
Battery State of Charge (SOC): Think of SOC as a fuel gauge for your battery. Expressed as a percentage, it shows the energy level of the battery in relation to its overall capacity.
Battery Capacity: Simply put, this denotes the total amount of energy a battery can store, typically given in ampere-hours. It provides some indication of how long the battery can provide power before needing a recharge.
Volts: This is the amount of electrical potential a battery holds. Electric potential means the difference in charge between the two terminals of the battery.
Charging methods
There are a few key methods for charging your 12V battery. Let’s take a quick look at each:
Onboard charging
Keeping your RV battery optimally charged as you travel is relatively straightforward. Let’s look at some of the primary onboard charging options:
Built-in converter/charger: This device essentially wears two hats. As a converter, it transforms 240V AC shore power into 12V DC power, which directly feeds into your RV's electrical system. Simultaneously, as a charger, it replenishes the deep-cycle battery.
Alternator charging: When your motorhome's engine is running, the alternator plays a key role in charging your battery. Although not primarily designed to fully charge a deep cycle battery, the alternator aids in providing a supplemental charge. This is especially useful during long drives.
Fixed solar panels: A sustainable and increasingly popular option, fixed solar panels capture the sun's energy and convert it to electricity. By integrating solar charging, motorhome owners can harness the power of the sun, especially beneficial during prolonged stays in sunny locations.
Portable chargers and generators
Unlike the built-in converter/charger, standalone portable chargers are designed to be connected directly to the battery. Note, because there are different charging modes and capacities available, it's crucial to select one compatible with your RV battery's requirements.
Additionally, generators can be a great option for those extended off-grid adventures. They not only charge your battery but can also power appliances directly. You’ll need to ensure your generator can produce sufficient power to cater to your needs without overloading.
How to charge your 12V battery
Ready to power up? Let’s break down the steps to doing it safely and effectively.
Step 1: Gather the necessary equipment
Before you start the charging process, it’s important to assemble everything you need and make sure you’re set up safely.
Battery charger: The choice of 12V battery charger is very important. Different battery types – whether flooded, AGM, or gel – have specific charging needs. Ensure you select a charger that not only matches your battery type but also has the suitable charging capacity to provide an efficient and safe recharge.
Safety equipment: Battery charging, while straightforward, does come with its own hazards. Before you get started, arm yourself with protective gloves and safety glasses. These precautions shield you from accidental spills, splashes, or any unforeseen mishaps, ensuring a risk-free charging procedure.
Step 2: Choose a suitable charging location
Selecting the right spot for charging is as crucial as having the appropriate equipment. Here are the key considerations when deciding on a location:
Stable and flat surface: To minimise any risk of the battery or charger toppling over, always place them on a flat and stable surface. This also means the charging process will remain uninterrupted and secure.
Distance from flammable materials: As an added safety measure, make sure the charging area is well away from any flammable materials or substances. Given the risk of sparks or overheating, it's always best to err on the side of caution and maintain a safe environment.
Step 3: Prepare the battery
Before you start the charging process, it's essential to ensure that the battery is in good condition and ready for charging. Here are the basic steps to prepare your battery:
Inspect for damage: Begin by thoroughly examining the battery for any visible signs of damage, such as cracks, bulges, or leaks. If you do find any of these, refrain from charging. Damaged batteries can pose serious safety risks.
Clean the terminals: Over time, battery terminals can accumulate corrosion or dirt which can impede the charging process. Using a battery terminal brush, gently scrub away any build-up to ensure a clean and efficient connection when charging.
Check the state of charge: Before you begin charging, gauge the battery's current state with a voltmeter. A fully charged 12V battery will typically register between 12.6 and 12.8 volts. This will help determine the required charging duration.
Step 4: Connect the charger
Next, you need to connect your charger. Incorrect connections can lead to ineffective charging or potential safety hazards. Here's how to correctly establish this connection:
Identify the terminals: Start by locating the positive (+) and negative (-) markings on the battery. These indicators are usually clearly marked, sometimes with red for positive and black for negative.
Positive connection: Take the charger's positive clamp – typically coloured red – and securely attach it to the battery's positive terminal. Ensure the connection is firm to prevent intermittent charging or potential sparks.
Negative connection: Similarly, take the charger's negative clamp – usually coloured black – and connect it to the battery's negative terminal, ensuring a stable and secure connection.
If your battery bank has multiple batteries then you will want to connect the battery charger over both batteries.
Step 5: Set the charger
Once connected, you’ll need to calibrate the charger's settings to best suit your battery. Every battery type (e.g., flooded, AGM, gel) has unique charging requirements. Based on your battery type and referring to the charger's instruction manual, adjust the settings to ensure the correct voltage and charging mode are selected.
Many modern chargers come equipped with an automatic detection feature. This setting allows the charger to identify the battery type and adjust its parameters to provide the optimal charge.
Step 6: Start the charging process
With the charger connected to the battery and correctly set, you can now plug it into a 240V power outlet. Next, switch on the charger. This will begin the flow of electrical current to the battery.
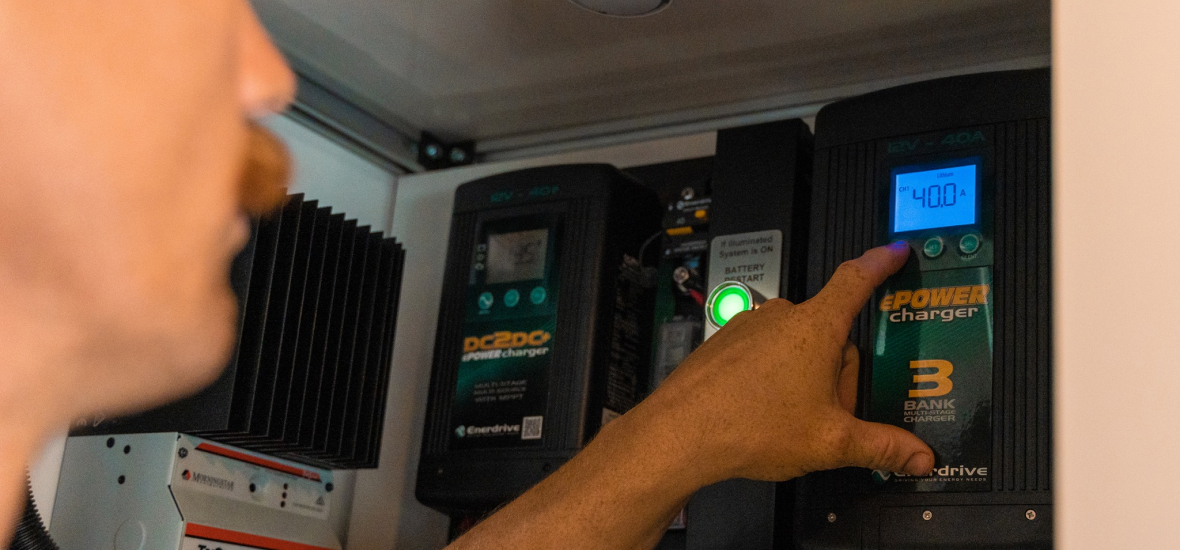
Step 7: Monitor the charging process
Most modern chargers come equipped with displays that provide real-time feedback on various aspects of the charging process. Keep a close watch on indicators that show the battery's voltage, the current being supplied, and the overall charge level.
Ideally, allow the battery to charge until it reaches the manufacturer-recommended level of full charge. In many modern systems, the charger might come with an automatic shutoff or transition to a maintenance/trickle charge mode once the battery reaches full capacity. If your charger possesses this feature, it provides an added layer of safety against potential overcharging.
Step 8: Disconnect the charger
Once the battery is adequately charged, it’s time to disconnect the charger. Proper disconnection is as crucial as the initial setup. Here's the step-by-step guide for a safe disconnection:
Unplug the charger: Before you detach any clamps from the battery, ensure that the charger is unplugged from the power outlet. This step minimises the risk of any accidental sparks or electrical feedback.
Begin with the negative: Always start by removing the negative (typically black) clamp from the battery's negative terminal. This practice ensures a safer disconnection process by reducing the chance of short-circuiting.
Detach the positive clamp: Once the negative connection is safely removed, proceed to disconnect the positive (usually red) clamp from the battery's positive terminal.
Note: In many modern RVs, the battery chargers are typically hard-wired to the battery, eliminating the necessity for frequent disconnections. These advanced chargers transition to a benign float charge when the battery is fully charged, ensuring no harm is done to the battery even if left connected. However, should you decide to halt the charging process or temporarily disconnect from the power source, simply switch off the 240v power outlet the charger is connected to. This ensures that no power feeds the charger while minimising potential risks.
Step 9: Perform post-charging checks
Almost done! Now that the battery is charged, you’ll want to make the following checks:
Re-examine battery terminals: Take a moment to inspect the battery terminals once more. They should be clean, with no signs of corrosion or residue.
Voltage measurement: Use a voltmeter to gauge the battery's voltage post-charge. A healthy, fully charged battery will generally register a reading between 12.6 to 12.8 volts.
Assess battery health: Should the battery fail to hold its charge or if you detect any signs of damage, distortion, or leakage, it warrants immediate attention. These symptoms may suggest that the battery is nearing the end of its lifecycle or has encountered a fault. It’s a good idea to either consult with a professional or consider a replacement.
Need a new battery for your RV?

By following the guidelines outlined in this ultimate guide, you'll be well-equipped to handle all aspects of charging, ensuring your battery remains healthy and reliable. Remember, a well-charged battery means a well-powered journey!
RV Super Centre has a wide range of 12V RV batteries, including AGM batteries, lead acid, gel batteries, and lithium-ion batteries. If you’re unsure about which battery is right for you, the good news is that the team at your local RV Super Centre can help. We can also help with advice on all aspects of charging. There’s an expert on hand at each of our branches throughout New Zealand.


